There are several ways to use the PicoPCMCIA for networking and I will go into detail on this in another update, but here I want to focus on something new I added, a basic onboard router.
The Issue
The PicoPCMCIA emulates an NE2000 network adapter, giving it near-universal support. Almost any device with a PCMCIA socket that supports networking already has NE2000 drivers available. The tradeoff is that the host sees it as a wired connection and has no awareness of Wi-Fi settings like SSID or key. To configure wireless, you must either use a custom utility on the target system or manually edit a configuration file on the SD card.
An excellent example of such a custom utility for a similiar scenerio (BlueSCSI DynaPort), is the “BlueSCSI Desk Accessory” written by Joshua Stein.
I hope to (or somebody will) adapt this to work with the PicoPCMCIA card for use with Macs, but that leaves many other platforms so for day 1 I needed a more universal solution beyond the DOS utility I will include.
The “Solution”
I’ve added a rudimentary onboard router to the PicoPCMCIA card.
On power-up, it automatically (if enabled) attempts to reconnect to the last used SSID. The host system (your PC/PDA) is always assigned a fixed IP address of 192.168.1.100, even if Wi-Fi has not yet connected. This is especially useful for operating systems without DHCP support, as the address can be statically configured.
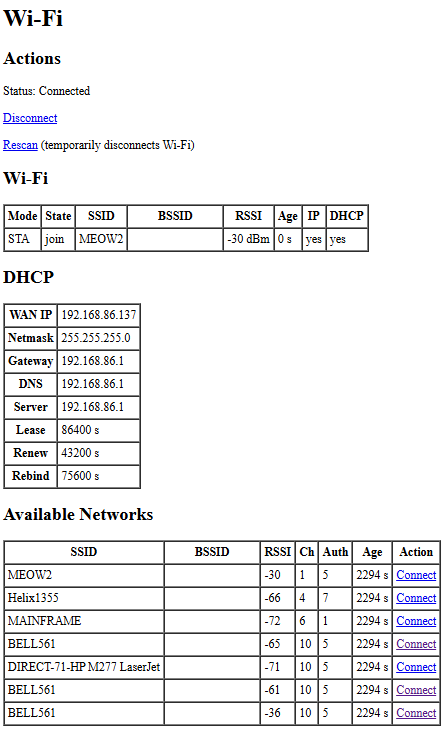
A simple management interface is available at h t t p://192.168.1.1/wifi. It uses a very basic HTML page designed to work with virtually any web browser. From there you can view the connection status, see what networks are available and attempt to connect. As this is the Pico doing the connection this of course can be any 802.11/b/g/n 2.4GHz network WPA/WPA2/WPA3 regardless what your computer/os is aware of.
Once Wi-Fi is connected, the host has IP network access through NAT routing, and WAN status is displayed on the management page. NAT also allows simultaneous use of Wi-Fi by both the host and the Pico itself, enabling additional features such as time synchronization or outbound connections from the emulated modem.
One point I would like to address is a way for devices using very simple browsers to be able to navigate through potential captive portals on public wi-fi’s. This will require some offloading of SSL etc. For another day.
Current Interface
This is simple HTML and can be improved easily, this is the bare minimum to get things going.
This is pretty cool, although the IP range you selected seems to be the exact one I use at home, so I wondered if there was a better IP range to use, and it turns out that the Link-local addresses which are used for auto-configuration when a router isn’t available are also to be used for static addresses:
https://en.wikipedia.org/wiki/Link-local_address
169.254.0.0/16 sounds like the right range to use to avoid conflicts.
Yeah 192.168.1.0/24 is common it was just in my head. I will change the default to avoid issues as 192.168.0.0/24 and 192.168.1.0/24 are pretty common. It can also be a configuration option to change.